Mikrotik

How to Mikrotik Acces Point?

Fadıl

1-first step

In this article, we will make an example about point-to-point (P2P) connection. We will use the SXT-G-5HPnD.
We will display the SXT-G-5HPnD wireless configuration with pictures.

Here we have the Lite configuration as an access point to be an antenna.

2-second step
How to Mikrotik Acces Point?

3-third step

How to Mikrotik Acces Point?

4-fourth step

How to Mikrotik Acces Point?

5-fifth step

How to Mikrotik Acces Point?

How to mikrotik Lite SXT 5 Station Bridge?

Fadıl

1-First step:

In this article, we will make an example of a point-to-point (P2P) connection. We will use SXT-G-5HPnD.
We will display the SXT-G-5HPnD wireless configuration with pictures.

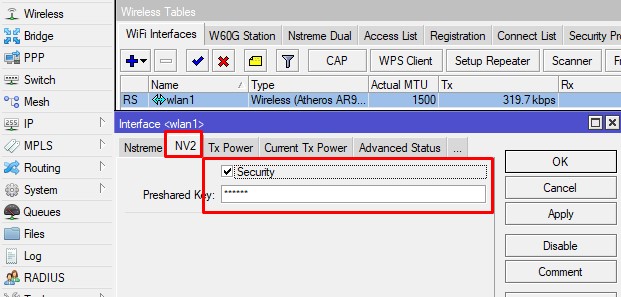
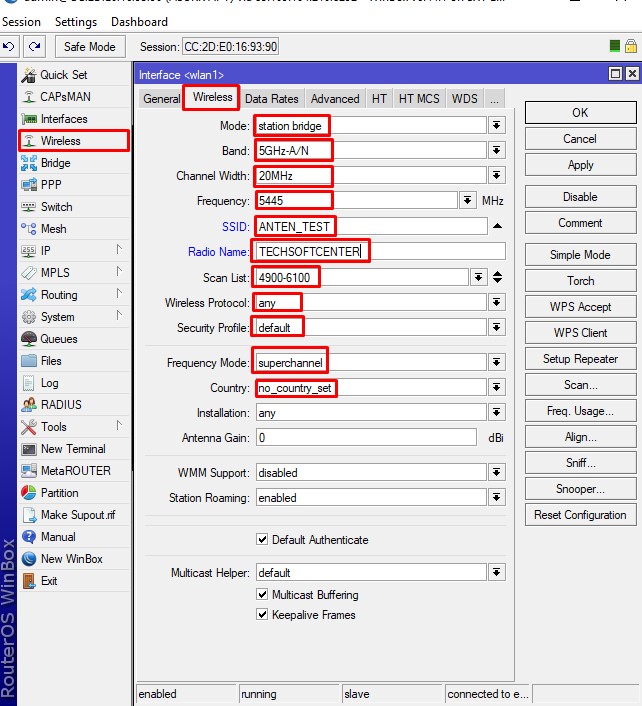
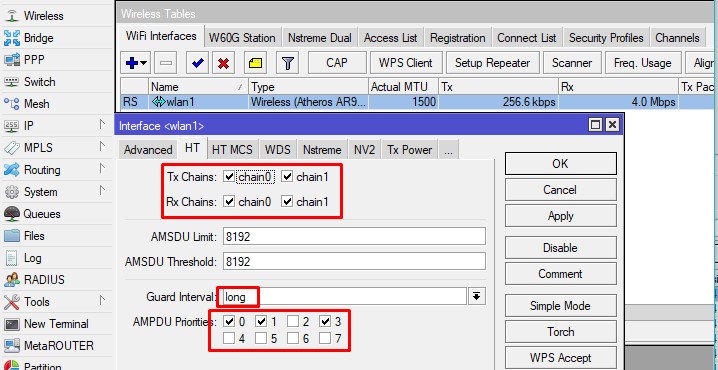
Firstly we are making configurations in WLAN 1 in the wireless tab. If we want to write the wireless settings as script code

/interface wireless
set [ find default-name=wlan1 ] ampdu-priorities=0,1,3 band=5ghz-a/n disabled=no frequency=5445 \ 
frequency-mode=superchannel guard-interval=long mode=station-bridge \
nv2-preshared-key=****** nv2-security=enabled radio-name="test" scan-list=4900-6100 \
ssid=Test_Sektor interface wireless security-profiles
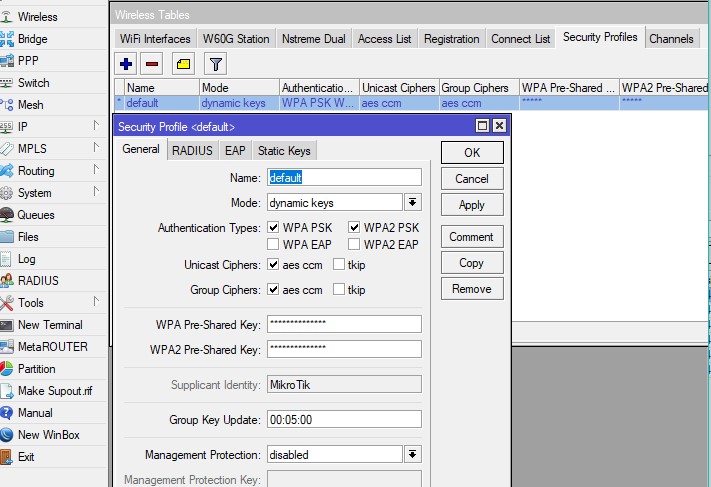
set [ find default=yes ] authentication-types=wpa-psk,wpa2-psk eap-methods="" mode=dynamic-keys \
supplicant-identity=MikroTik wpa-pre-shared-key=password  wpa2-pre-shared-key=password

Mikrotik Wirelles

MIKROTIK: SETUP SQUIDBLACKLIST FIREWALL

MIKROTIK: SETUP SQUIDBLACKLIST FIREWALL

Fadıl

The blacklists were incredibly simple to implement into RouterOS and once configured, the lists can be scheduled to update at regular intervals via the RouterOS system scheduler. Squidblacklist.org provides a list of available blacklists, but make sure to review the blacklist compatibility chart first, before implementing the list into your RouterOS configuration. In addition, you will need to change the “dst-path” value to an existing path for the script to work. If you want to download the blacklist to the root of your MikroTik you can delete the “dst-path” property and its value entirely . Also, make sure that the “in-interface” and “out-interface” property value is set to that of your network environments WAN interface. Should you choose the “All-In-One Firewall/Filter Setup” script (via copy/paste in the MikroTik terminal), you will need to enable the scheduled tasks, since they are disabled by default in the script.

Queues Configuration Details

Fadıl

1. Simple Queue(Statik Queues)

  • Name: User A
  • Target: 172.16.1.10
  • Bandwidth: 1M Upload and 1M Download
  • Name: User B
  • Target:172.16.1.11
  • Bandwidth:700k Upload and 700k Download

2. Priority and Queue Order

By Default, all queues work by their order list(executes by serial or order number), as priority is 8 by default for each simple queues. If we change the priority less then 8 its will get more priority means if any queue has a priority of 7 Mikrotik queues will ensure his bandwidth first whatever his order. Priority 1 is MAX and it continues to 8.

Mikrotik Automatic Version Update Monthly / Weekly

Fadıl

If you want Mikrotik to update itself automatically, we can prepare a script to make it 1 per month.

In this script we will specify 30 days in interval and add and implement the following script.

In this way, the device will periodically check for an update and when it deems it will perform the update automatically.

First, we’re setting up a timer that runs the update script.

/system scheduler add interval=4w2d name=Auto_Update on-event="/system script run update" 
policy=ftp,reboot,read,write,policy,test,password,sniff,sensitive,romon

We prepared the timer and run the script name we have just started.
Now let’s edit the contents of the script.